Creating your First Avatar
Welcome to the world of Virtual Reality. Today we will explore our first step into this new and exciting world: creating your own Avatar. Ready? Let's go!
First, make sure you have read "Getting Started", the introductory article which is required reading for making an Oculus Rift enabled game in Unity. If you haven't done so already, please read the article in full before proceeding.
How to upload VRchat avatars
To make it easier for people to play your game you can upload avatars from VRchat. It's completely free and easy to do! Just follow these steps:
Step 1: Create an account or login at vrchat.com
Step 2: Make your Avatar
- Decide what model you're going to use for creating the avatar.
- If you want to make a model from scratch, the best way is to use Blender (Free and open-source software), which can be downloaded here: https://www.blender.org/download/
- This tutorial will also help you get started with blender: http://wiki.vrchat.com/wiki/
What is an avatar?
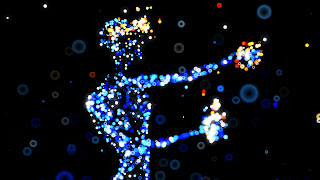
An avatar is what you will look like in VRchat. It's a collection of items that are combined to form the 3D model that your Avatar uses to represent you in Virtual Reality.
The definition of an Avatar Item or "clothing" usually refers to the way these items appear if they were viewed by another person wearing a headset instead of the Avatar itself.
Why do I need one?
Having an avatar in VRchat allows you to represent yourself in the game and is often referred to as your player's "virtual representation". It has many uses and benefits:
- You can communicate using it in VRchat. This includes gestures and facial expressions which will be visible on your virtual representation in VR along with audio built into the Rift Headset.
- It's a lot of fun! People love interacting with other people in VR and your avatar allows them to see, hear and communicate with you like they would if you were physically facing to face (or rather face to faceplate)!
How to make your own avatar
To start with, let's create the simplest Avatar possible. We are going to use Unity 3D to design our avatar in full Virtual Reality. This will allow you to view your creation from all angles and get a good impression of how it looks when wearing an Oculus Rift Headset in VRchat.
Before we begin though, please check that you have the following:
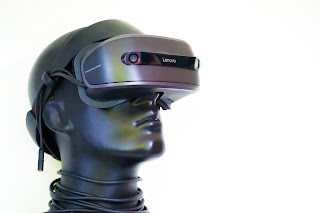
A VR Headset (Oculus Rift DK1 or DK2)
Oculus Runtime 0.8+
Unity 3D 5. x
Types of avatars
- Neutral: A basic avatar that contains one wearable and one invisible item. This is the simplest avatar we can make because it only consists of 1 item slot.
- Spacial: An Avatar with 4 slots, mainly for aesthetics as there is no content in those slots.
- Mesh: An avatar with 8 slots, capable of having a total of 8 items. This avatar is meant to be custom-made, allowing you to place any number of items into the slots.
- Misc: The misc avatars are not true avatars in that they do not contain wearable or invisible items. They are purely for aesthetics and have no functionality within VRchat at all. These include things like hair, clothing, accessories, etc.
Examples of avatars
Non-neutral avatars
When creating your avatar, you can pick from 3 different "hats" to start with. These are neutral items because they contain no other content within them besides the textures of the models themselves. This form of the item creates a non-neutral avatar type which has 4 slots instead of 1 or 8.
- Head
- Hands (2 slots)
- Feet (2 Slots)
Conclusion
Once you have finished your avatar, it's time to upload the file to VRchat! To do this, go to your inventory and click "upload" on the left. Once your avatar has uploaded successfully, you're ready to start using it in VRchat!
Original Article: http://wiki.vrchat.com/w/index

Comments
Post a Comment